Goals and victory
Build the goal tree to decide win and loss conditions for each side.
Every side in a scenario carries one goal, and the game decides that side's result by evaluating it. A goal on its own is a simple test. Sink these ships. Protect this convoy. Survive two hours. Typical scenarios need more than one condition, so a Compound goal holds other goals and combines their results with AND or OR. Nest compounds inside compounds and you have a tree with a single goal at the root.
Goals belong to a side rather than the scenario, so each side needs its own. A scenario where both sides can win at once may indicate a scenario with one side's tree left unwritten.
Open the goal editor#
Goals are edited on the goals page of the scenario information window. Open that window from the edit toolbar, then pick the last of its page icons.
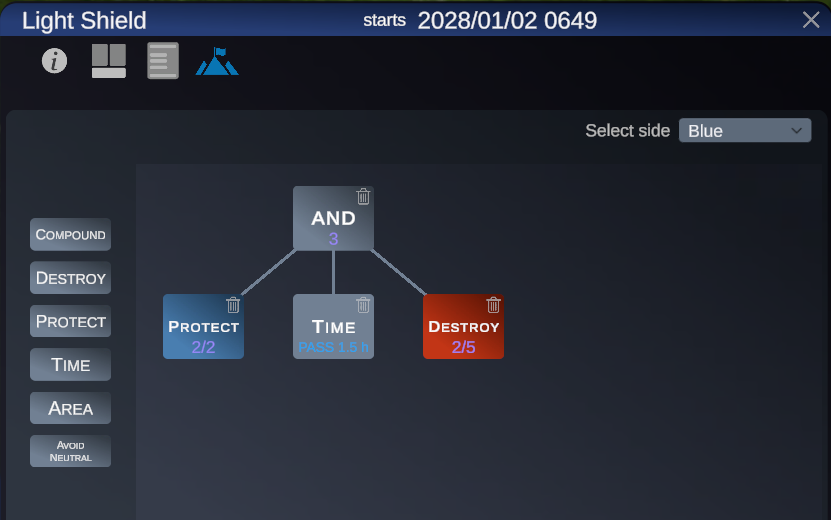
Select side at the top right chooses whose goals you are looking at. Changing it swaps the whole tree, so build one side, switch, and build the other.
A new scenario starts from a template that already gives each side a Time goal, one failing after an hour and one passing after an hour. Delete both unless a one hour limit is what you want.
Building a tree#
Goal types live in the palette down the left side.
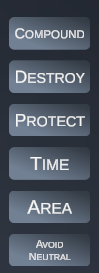
The window draws the tree as icons joined by lines, and you build it by dragging from the palette.
- Drag a goal type from the palette onto empty space to create the root goal. Drag one onto a Compound icon to nest it there. Only Compound icons accept a drop.
- Double-click a goal icon to open its editor.
- Scroll on a goal icon to change its number without opening anything.
- Each icon carries a delete button, which asks before it removes the goal and everything under it.
There is one root goal per side. Once it exists, dropping another onto empty space does nothing. Delete the root first, or make the root a Compound and hang the rest underneath it.
Every icon shows its type as a label with a second line of detail below, so you can read the shape of a tree without opening anything. Icons are colored by type, which makes a large tree easier to scan.

Goal types#
| Type | Label on the icon | Passes when |
|---|---|---|
| Destroy | Destroy | The required number of listed units are destroyed |
| Protect | Protect | The required number of listed units are still alive at the end |
| Time | Time | The clock reaches a pass time, or fails when it reaches a fail time |
| Area | Area | The required number of listed units hold an area for long enough |
| Compound | AND or OR | Its children pass, combined by the logic shown |
| Avoid Neutral | Avoid Neutral | Damage done to neutral units stays under a tolerance |
Destroy and Protect#
Both take a list of units and a count. The icon reads the count over the list length, so 2/5 means two of the five listed units satisfy the goal. Scroll on the icon to change the count, which is clamped between one and the number of units listed.
Double-click the icon to open Update goal targets.
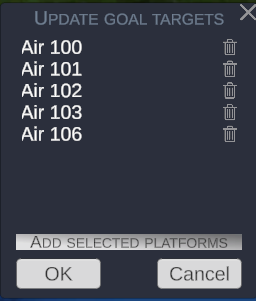
The list starts from whatever the goal already watches. To add to it, select the units on the map first, then click Add selected platforms. Anything already listed is skipped, so you can select a whole formation and press it without ending up with duplicates. The trash icon on a row removes that unit. OK saves the list and Cancel throws the edits away.
Because the button takes the current map selection, a goal aimed at a surface action group is one box selection and one click, and the count then decides how much of the group has to be destroyed or protected.
Time#
A Time goal carries a pass timeout and a fail timeout, both in hours, and can use either or both. Double-click it for a pair of sliders running from 0 to 100 hours in tenths. The icon shows whichever timeout comes first, prefixed PASS or FAIL.
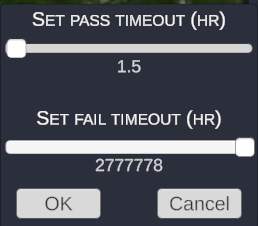
Set only a fail timeout for a deadline the side has to beat. Set only a pass timeout for a survival timer. Set both to bound a window on either side.
A timeout that is not in use does not read as zero or blank. It parks at a number in the millions of hours, which is the game's way of saying the clock never reaches it. Leave it there. Dragging it down to a real value turns it into a condition the side has to meet.
Area#
An Area goal asks a number of units to be inside a region for a length of time. The icon shows the time in hours, and scrolling adjusts it in fifteen minute steps.
Double-click the icon to open two things at once. The same Update goal targets window opens for the units the goal applies to, and the region itself becomes editable on the map, initialized near the center of the camera view if the goal has no region yet.
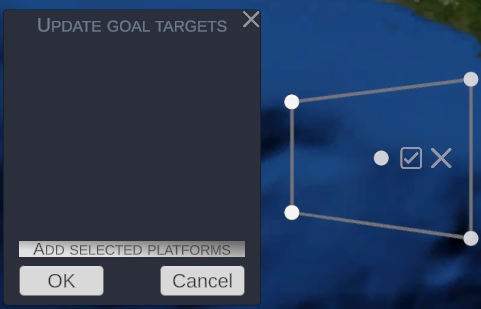
Drag the corner handles to shape the region. The check mark accepts it and the cross discards it.
Compound#
A Compound goal has no test of its own. It reads AND or OR with the number of children below it, and scrolling toggles the logic. AND wants every child to pass. OR wants one.
Nest compounds to express anything more involved. A tree reading OR over an AND of two Destroy goals and a single Protect goal means "sink both of those, or keep that one alive".
Avoid Neutral#
Avoid Neutral fails a side that does too much damage to units belonging to a neutral country. The icon shows the tolerance after tol, and scrolling moves it in quarter steps. A damage tolerance of zero means any damage at all fails the goal. A tolerance of one means one neutral unit fully damaged, two 50% damaged, or any combination where the damage fractions add up to one.
Add it under an AND compound alongside whatever the side is actually trying to do, so winning also requires avoiding damage on the neutrals.
Rules of engagement#
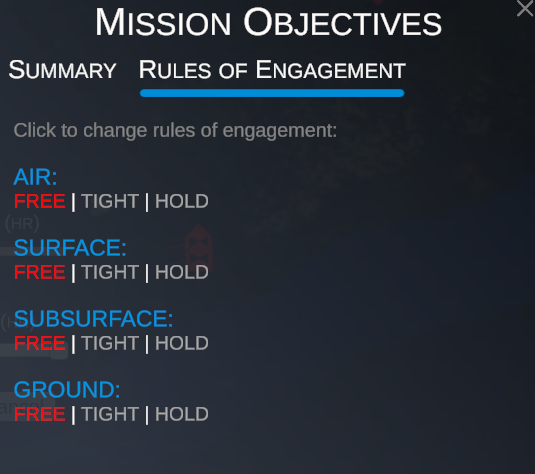
Rules of engagement are not part of the goal tree and live in a different window. Open Mission Objectives from the toolbar and pick the Rules of engagement tab. This sets what a side's units may fire at before a player gives them any orders, in four domains.
| Domain | Covers |
|---|---|
| Air | Aircraft, helicopters, and missiles in flight |
| Surface | Ships |
| Subsurface | Submarines and torpedoes |
| Ground | Ground units and installations |
Each domain takes one of three values. Click one to set it.
| Value | Units may fire at |
|---|---|
FREE | Any target not positively identified as friendly |
TIGHT | Only targets positively identified as hostile |
HOLD | Only in self-defense, or when ordered |
The setting in force is the one drawn in color, red for FREE, yellow for TIGHT, and blue for HOLD. Hovering a value spells out what it permits.
The difference between FREE and TIGHT is the burden of proof, not aggression. FREE shoots at anything it cannot confirm is friendly, so it will engage neutrals and unidentified contacts. TIGHT waits for a positive hostile identification. HOLD is not a total hold, because a unit under fire still can defend itself.
The blank template starts every side at FREE in all four domains. That suits a scenario opening with shooting already underway, and it is questionable for a scenario opening with a standoff, where FREE will start the battle for you the moment an unidentified contact appears. Setting Air and Surface to TIGHT is a common way to make the first shot a decision rather than an accident, and it pairs well with an Avoid Neutral goal.
This window has no side selector. It applies to whichever side is active in the selector at the top of the screen, the same one that decides where new units go. To set rules of engagement for the other side, switch that selector first, then open the window again. The Select side dropdown in the goal editor covers goals only.